Foil Stamping Business Cards: Gold, Silver, and Holographic Foil Design Guide
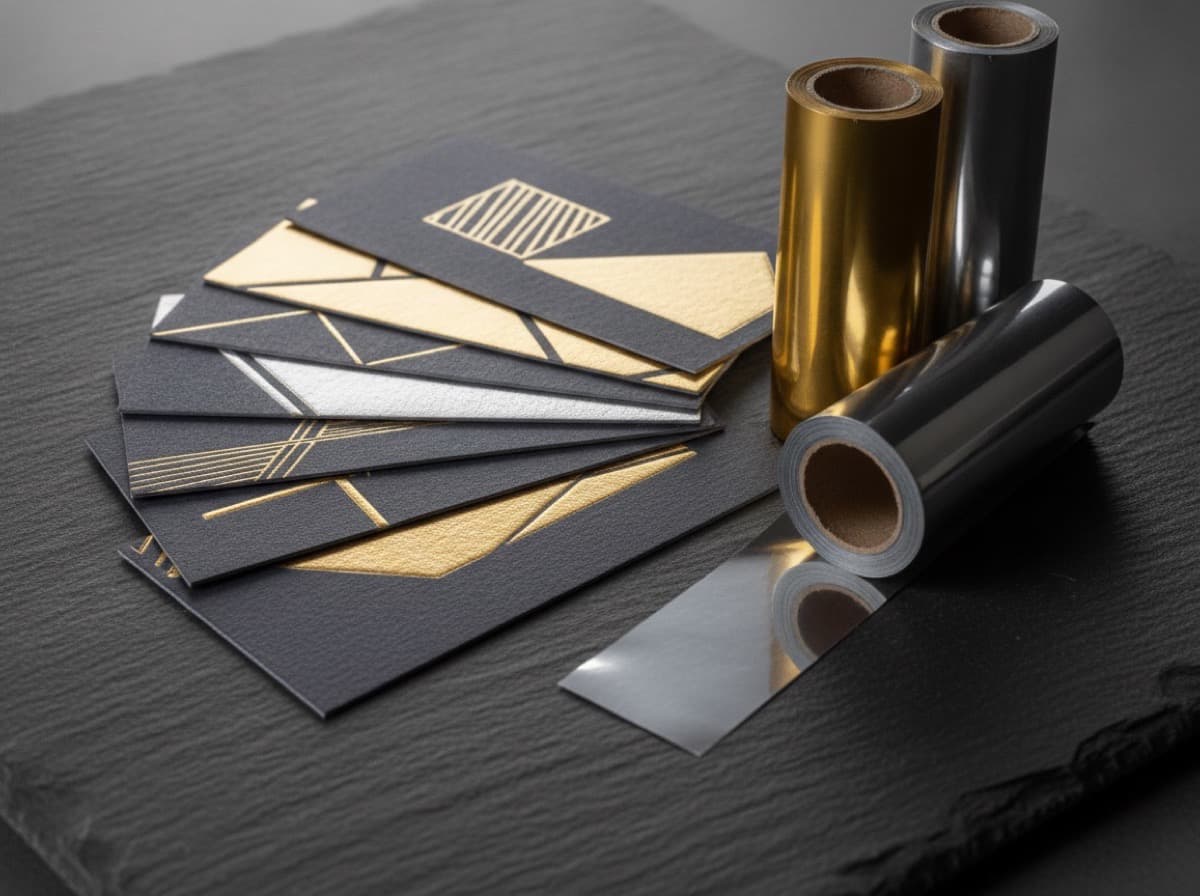
Foil stamping applies a thin metallic or holographic film to the surface of your card using heat and pressure from a custom die. The result is a reflective, luminous finish that no ink or digital printing can replicate — foil catches light in a way that's immediately noticed and registered as "premium."
This guide covers foil types, design requirements, and how to set up your files for foil printing.
What Foil Stamping Is
Foil stamping is a separate printing process from your card's color printing. A heated metal die (a custom plate matching your design) is pressed onto the card with a foil film between the die and the card surface. The heat and pressure transfer the metallic coating from the film to the card.
The result:
- Metallic: Gold, silver, copper, or rose gold — reflective and luminous
- Matte metallic: A soft, non-reflective metallic finish
- Holographic: Iridescent, color-shifting patterns (rainbow, starburst, geometric)
- Colored foil: Foil in specific hues — blue, red, black, white, and others
Foil stamping is distinct from:
- Foil laminate: A metallic laminate applied to the entire card surface
- Digital metallic ink: An inferior simulation using metallic-looking inks (more affordable, less effective)
- UV coating: High-gloss clear coating (spot UV is clear, not metallic)
Foil Types
Gold Foil
The most classic and popular foil choice. Gold carries associations of achievement, luxury, and excellence. Works on both light (cream, white) and dark (black, navy) backgrounds.
Warm gold vs. pale gold: Standard gold has a rich, warm brass undertone. Some printers offer "bright gold" (cooler, more yellow) or "antique gold" (darker, muted).
Best uses: Law firms, real estate, luxury retail, finance, weddings.
Silver Foil
Cooler and more modern than gold. Silver on black creates a dramatically high-contrast look popular in technology, design, and entertainment.
Best uses: Technology, design agencies, entertainment, architectural firms.
Rose Gold Foil
Warm pink-gold tone. Has surged in popularity across wedding, lifestyle, beauty, and retail categories.
Best uses: Wedding professionals, beauty brands, lifestyle, women's fashion.
Copper Foil
Between gold and rose gold — warmer than gold, less pink than rose gold. Associated with artisan quality, craft brands, and elevated lifestyle.
Best uses: Artisan food and beverage, craft-forward brands, design-forward professionals.
Holographic Foil
Color-shifting, iridescent, multi-angle rainbow effect. Captures attention and communicates innovation and forward-looking aesthetics.
Best uses: Entertainment, music, tech startups, cannabis, fashion, anything aimed at a younger demographic.
Matte Metallic Foil
A non-glossy metallic — reflective but soft rather than mirror-like. More subtle and sophisticated than standard foil on certain card stocks.
Best uses: Fashion, wellness, luxury brands, any context where high gloss feels too showy.
What Foil Highlights Best
Foil is applied through a die, so it works best on:
- Your name or logo — the most common and effective foil application
- A monogram or initials — initials in foil are a classic premium treatment
- A single line of text — job title, tagline, or key credential
- Geometric design elements — lines, frames, abstract marks
- A border or frame — elegant when foil frames the full card edge
What foil doesn't work well on:
- Very thin lines (less than 1pt) — foil can't reproduce hairline details cleanly
- Very small text (below 8pt) — individual letterforms may fill in
- Large solid fills without detail (foil on a large solid looks like a metallic sticker, not a premium treatment)
- Complex photography or intricate gradients
The more focused the foil, the more premium it looks. A single word in gold foil makes that word feel significant. Gold foil everywhere loses contrast and impact.
Foil and Paper Combinations
Foil shows most dramatically on uncoated or lightly coated stock:
- Black card + gold foil: Maximum drama, immediately premium
- Navy card + silver foil: Classic and clean
- Cream/white uncoated + rose gold: Romantic, warm, elegant
- Black card + holographic: High energy, entertainment-forward
What makes foil look cheaper:
- Foil on a thin, flexible card stock (feels lightweight)
- Foil on an already-glossy card (the foil blends with the laminate)
- Oversized areas of foil without design restraint
Best stock for foil: Thick uncoated or soft-touch matte (13pt to 19pt). The tactile premium of the stock amplifies the visual luxury of the foil.
Setting Up Your Foil File
Foil printing requires a separate file that tells the printer exactly where to apply foil — called a "foil layer," "foil mask," or sometimes a "die file."
The Standard Approach
- Your print file: Full-color card at 3.75 × 2.25 inches (standard business card with bleed)
- Your foil mask file: A separate layer or document showing ONLY the foil areas
Foil Mask Specifications
The foil mask is typically:
- A separate PDF document at the same dimensions as your print file
- Black = foil area (apply foil here)
- White = no foil
- All elements are vectors or high-resolution (300 DPI)
- 100% K (pure black) for foil areas — not RGB black or mixed CMYK
Creating the Foil Mask in Illustrator
- New document at 3.75 × 2.25 inches (same as print file)
- White background (fill artboard with 100% white)
- Recreate foil elements in 100% K — exact position matching your print file
- Export as PDF/X-1a with same bleed settings
Critical: Exact position match. The foil die is created from your mask file. If your name is in the wrong position in the mask, the foil will miss your name on the card. Use precise coordinates.
Minimum Foil Element Sizes
- Lines: 1.5pt minimum recommended, 2pt preferred
- Serif text: 10pt minimum — thin serif strokes may not hold foil cleanly
- Sans-serif text: 8pt minimum — cleaner holds at small sizes
- Small shapes: 0.15" minimum in any dimension
Foil Over Ink vs. Foil on Unprinted Areas
Foil on unprinted paper (blind foil): The foil adheres directly to the paper. Clean, crisp adhesion.
Foil over printed ink: Some printers can apply foil over printed color areas, but adhesion can be inconsistent — the ink creates a texture layer under the foil. Discuss with your printer if you plan foil over printed ink.
Combining Foil with Other Finishes
Foil + Spot UV
Applying both foil (metallic, slightly raised) and spot UV (glossy, slightly raised) to the same card creates a richly tactile premium experience. Elements can be in foil, elements in spot UV, or some elements in both.
Design rule: Let foil carry your most important element (name, logo). Spot UV handles secondary design elements or texture.
Foil + Letterpress
Less common but extraordinary when executed. Letterpress creates an indented impression; foil adds metallic to that impression. The combination creates a uniquely tactile result.
Foil + Soft-Touch Matte
The most popular combination. Soft-touch matte as the base provides velvety texture; foil elements pop dramatically against the non-reflective surface.
Cost Range
Foil stamping adds cost primarily from:
- Die creation: A metal die matching your artwork is made once per design. Cost: $50-200 per foil die.
- Per-card foil cost: The additional press pass for foil application.
Typical additional costs over standard printing:
- 100 cards: +$50-120 (die creation dominates)
- 500 cards: +$70-150 (die amortized, more cards)
- 1,000 cards: +$80-200
Die creation is a one-time cost — if you reorder with the same design, you only pay for the foil application (not the die again).
Checklist
- [ ] Foil type selected (gold, silver, rose gold, holographic, etc.)
- [ ] Foil mask file created (100% K black on white background)
- [ ] Mask dimensions exactly match print file (3.75 × 2.25)
- [ ] Foil elements are minimum size (1.5pt lines, 8-10pt text)
- [ ] Stock is uncoated or soft-touch matte (not gloss)
- [ ] Foil is focused on key element (name, logo) — not overused
- [ ] Foil over printed ink discussed with printer if applicable
- [ ] Proof ordered (physical proof — foil cannot be proofed digitally)
- [ ] Reorder plan documented (save the die file)
Get 10% off your first order
Join our list for practical printing guides, new finish ideas, and a welcome coupon for your first order.
No spam. Unsubscribe anytime.
Ready to put these tips into print?
Order Business CardsNot sure which option fits? Ask Pro Card Crafters