Spot UV Business Cards: What Spot UV Is and How to Design for It
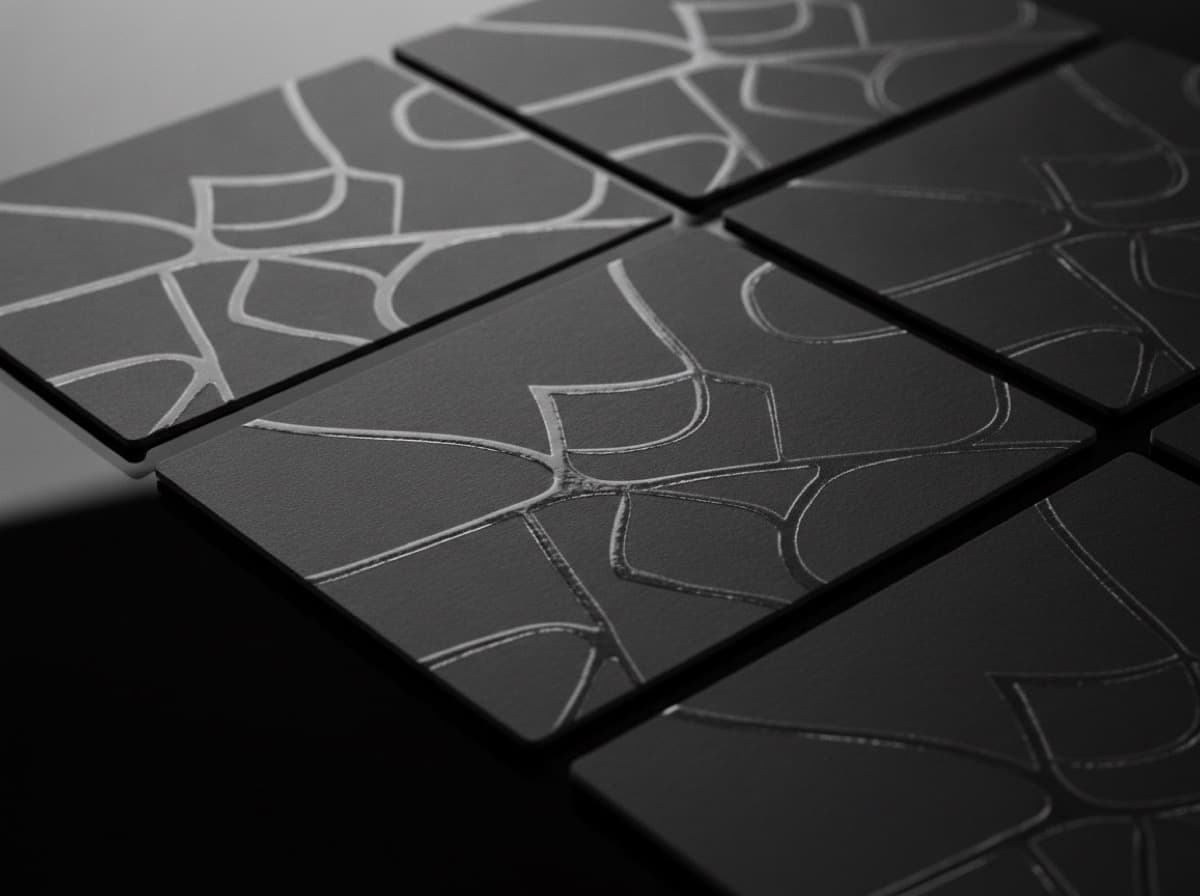
Spot UV is one of the most effective special finishes in business card printing — a raised, ultra-glossy coating applied to specific areas of a card, creating tactile contrast with a matte background. When someone picks up a spot UV card, they feel it before they've finished reading it.
What Spot UV Is
"UV" refers to ultraviolet-cured coating — a thick, clear varnish that hardens instantly under UV light. In "full UV" or "gloss UV" laminate, this coating covers the entire card. In spot UV, the coating is applied only to specific areas, creating contrast between the coated (glossy, slightly raised) and uncoated (matte) zones.
The effect has three dimensions:
- Visual: High-gloss areas catch and reflect light differently than the matte surface
- Tactile: The UV coating is slightly raised — you can feel the boundary between coated and uncoated
- Design: Elements in spot UV appear to lift off the card surface, creating visual depth
What Spot UV Can Highlight
Spot UV is most effective on:
- Your name or logo: The most important element of the card, literally made to stand out
- A single headline or tagline: The words you most want to be read
- A geometric design element: Lines, shapes, or patterns that gain depth through the finish
- A background texture or pattern: Subtle texture that becomes visible when it catches light at an angle
- Photography or illustration detail: Selective gloss on specific image areas
The principle: Spot UV should highlight what matters most, not cover everything. If too much of the card is spot UV, the effect loses its contrast — everything becomes gloss, and gloss becomes the baseline.
The Standard Process: Matte + Spot UV
The most common and effective spot UV combination:
- Card is printed in CMYK with your full color design
- Soft-touch matte laminate is applied over the entire card — creating a velvety, non-reflective surface
- Spot UV coating is applied to specific areas using a die plate matching your artwork
The result: the soft-touch matte provides maximum contrast for the glossy UV coating, amplifying both the visual and tactile effect. Cards printed on gloss laminate with spot UV have less contrast and less tactile impact.
Substrate alternatives:
- Uncoated cotton or felt stock + spot UV: Particularly premium feel, organic texture contrasting with precision gloss
- Matte laminate (not soft-touch) + spot UV: Good contrast, less velvety than soft-touch
- Suede/velvet laminate + spot UV: Maximum tactile contrast
Preparing Your Spot UV File
Spot UV requires a separate "mask" file that tells the printer exactly where to apply the UV coating. This file is in addition to your print-ready PDF.
The Spot UV Mask File
Your printer needs:
- The print file: Your full-color front/back at 3.75 × 2.25 inches (standard with bleed)
- The spot UV mask: A separate file showing ONLY the areas to receive UV coating
Mask File Specifications
The mask is typically:
- A separate PDF page or a separate file
- Black = spot UV area (areas you want coated, set to 100% black K)
- White = no UV (areas you want matte)
- All elements are vectors or high-res (300 DPI minimum for rasterized elements)
- Same document dimensions as your print file (3.75 × 2.25 with same bleed)
Why 100% K for the mask: The printer's UV coating system reads the mask at a specific opacity value. Using 100% K (pure black) ensures the coating is applied at full opacity. Using RGB black or a mixed CMYK black may not trigger the system correctly.
Creating the Mask in Adobe Illustrator
- Create a new file at 3.75 × 2.25 inches (matching your print file)
- Fill the artboard with white (100% white, CMYK 0-0-0-0)
- Recreate the spot UV elements in 100% K black — exact size and position matching your print file
- Name the layer or file clearly: "FRONT_SPOTUV" or "SPOT_MASK"
- Export as PDF with the same bleed settings as your print file
Precise alignment is critical: If your spot UV mask highlights your logo, the mask shape must precisely match the logo position in your print file. Any offset creates a visible misalignment — the gloss won't center on the logo.
Using a Dedicated Spot Color Swatch
Professional printers sometimes request a specific spot color named "SpotUV" in the file instead of a separate mask:
- In your print file Illustrator document, create a new spot color swatch named "SpotUV" or "SPOT UV"
- Color: 100% of a single ink (not CMYK, but a spot ink)
- Apply this swatch to the elements you want UV coated
- When exporting, include this spot color in the PDF
Check with your specific printer whether they prefer a separate mask file or an embedded spot color — preferences vary.
Design Considerations for Spot UV
Minimum Size for UV Elements
UV coating requires a minimum element size to apply cleanly. Very thin lines or tiny text may:
- Not hold the UV coating cleanly
- Show rough edges rather than the crisp border you designed
Minimum spot UV element size:
- Lines: 1pt minimum (prefer 2pt+)
- Text: 8pt minimum (prefer 12pt+)
- Small shapes: minimum 0.1 inch in any dimension
Registration Tolerance
Spot UV is applied in a separate pass from printing and laminating. Even on precision equipment, there is a small registration tolerance — typically ±0.5mm. Design your spot UV elements with this tolerance in mind:
- Spot UV over a solid color: registration tolerance rarely causes issues
- Spot UV over a complex image: small misalignment may be visible if the UV exactly outlines image elements
- Spot UV on text: the UV should generously cover the text with some margin, not exactly trace each letterform
Blind Embossing Alternative
For cards printed on very dark stock (black or deep navy), spot UV may not be visible against the background at normal light angles. An alternative is blind spot UV — the coating is still applied but shows primarily as a texture contrast, not a gloss-over-color effect. Test before committing to large quantities.
When to Use Spot UV
Best use cases:
- Premium client work where card investment signals your service quality
- Creative professionals where design craft is part of your pitch
- High-end B2B services (luxury real estate, private banking, law)
- Any situation where first impressions justify a $0.15-0.50 per card premium
Less compelling use cases:
- Very high volume (10,000+ cards): cost per card becomes significant
- Cards that will be handled frequently in degrading environments
- Professions where showing off your card feels inconsistent with service culture
Cost Range
Spot UV pricing varies significantly by quantity and printer:
- 100 cards: $30-60 additional over standard printing
- 500 cards: $40-80 additional
- 1,000 cards: $50-100 additional
- 2,500 cards: $75-150 additional
Compare this to the memorable impression the card creates — and the value of the first meeting where you hand it over.
Checklist
- [ ] Spot UV elements identified — name, logo, or key design element
- [ ] Separate mask file created (100% K black on white background)
- [ ] Mask file dimensions match print file exactly
- [ ] Spot UV elements minimum size (2pt lines, 12pt text, 0.1" shapes)
- [ ] Substrate is matte or soft-touch (not gloss laminate — reduces contrast)
- [ ] Printer's specific mask file format confirmed
- [ ] Proof ordered before full quantity run
- [ ] Registration tolerance accounted for in mask design
Get 10% off your first order
Join our list for practical printing guides, new finish ideas, and a welcome coupon for your first order.
No spam. Unsubscribe anytime.
Ready to put these tips into print?
Order Business CardsNot sure which option fits? Ask Pro Card Crafters